How to Integrate Fineguide with Helpscout
Connect Fineguide to Help Scout step by step: create an app, add its App ID and secret, choose a mailbox, and forward chat tickets to your inbox.

This document provides step-by-step instructions for setting up the integration with Helpscout. This integration enables users to transition from automated assistance to human support.
Why this integration is useful - while Fineguide handles most of the inquiries, some users might still need human interaction. This pairing becomes especially beneficial when most inquiries can be managed by AI, leaving only those that require human support for your customer service team to handle.
Let’s get started!
Step I
Login to your Fineguide account, go to Settings > Integrations > Helpscout
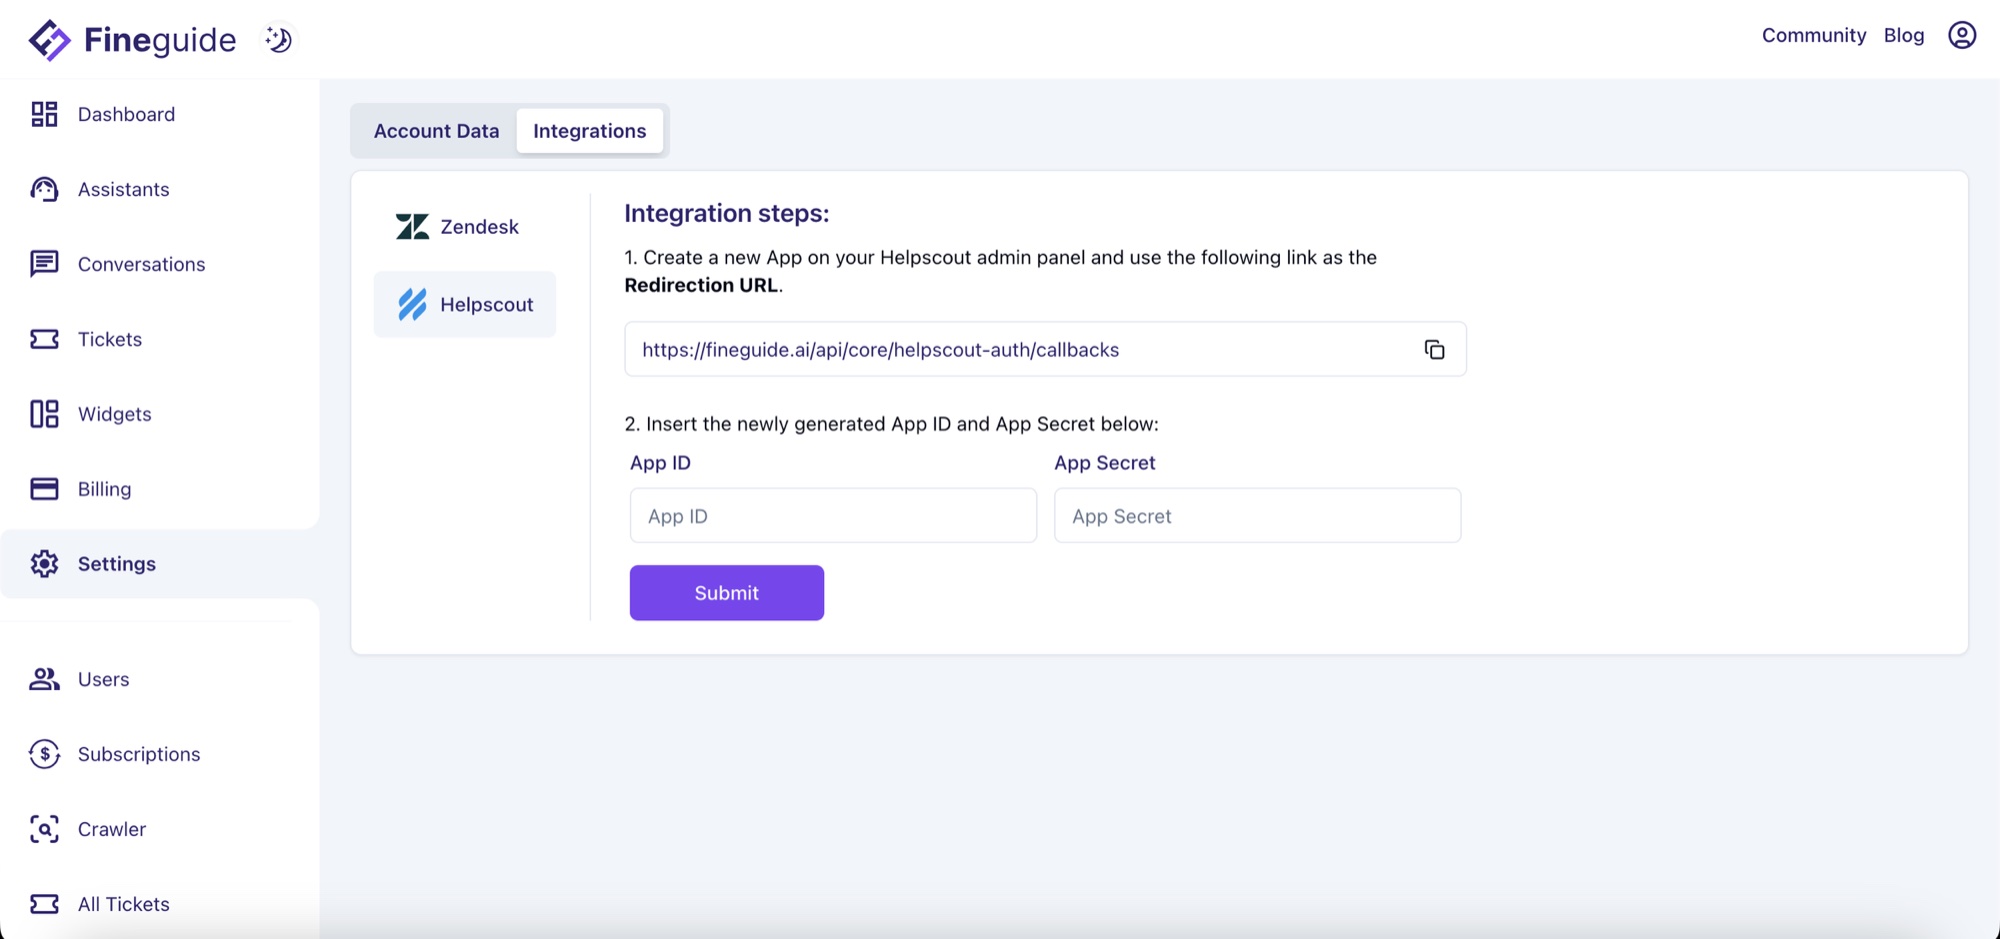
click on the Copy the redirection URL icon. It’s better to keep this tab open since we’re going to need it in Step 3.
Step 2
Open a new tab in your browser and log in to Helpscout. Once logged in, Click on Account > Your Profile
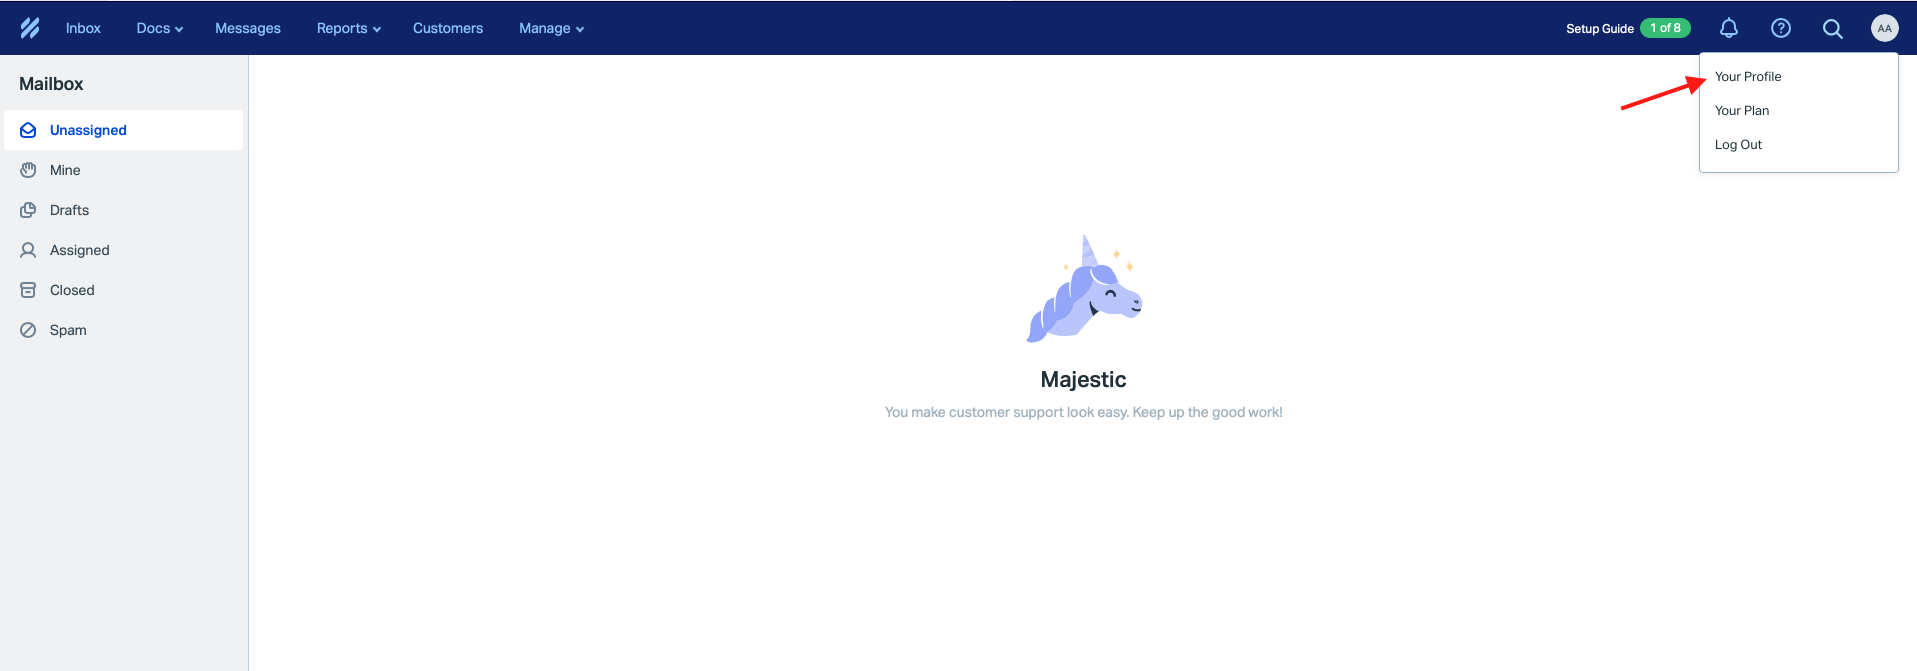
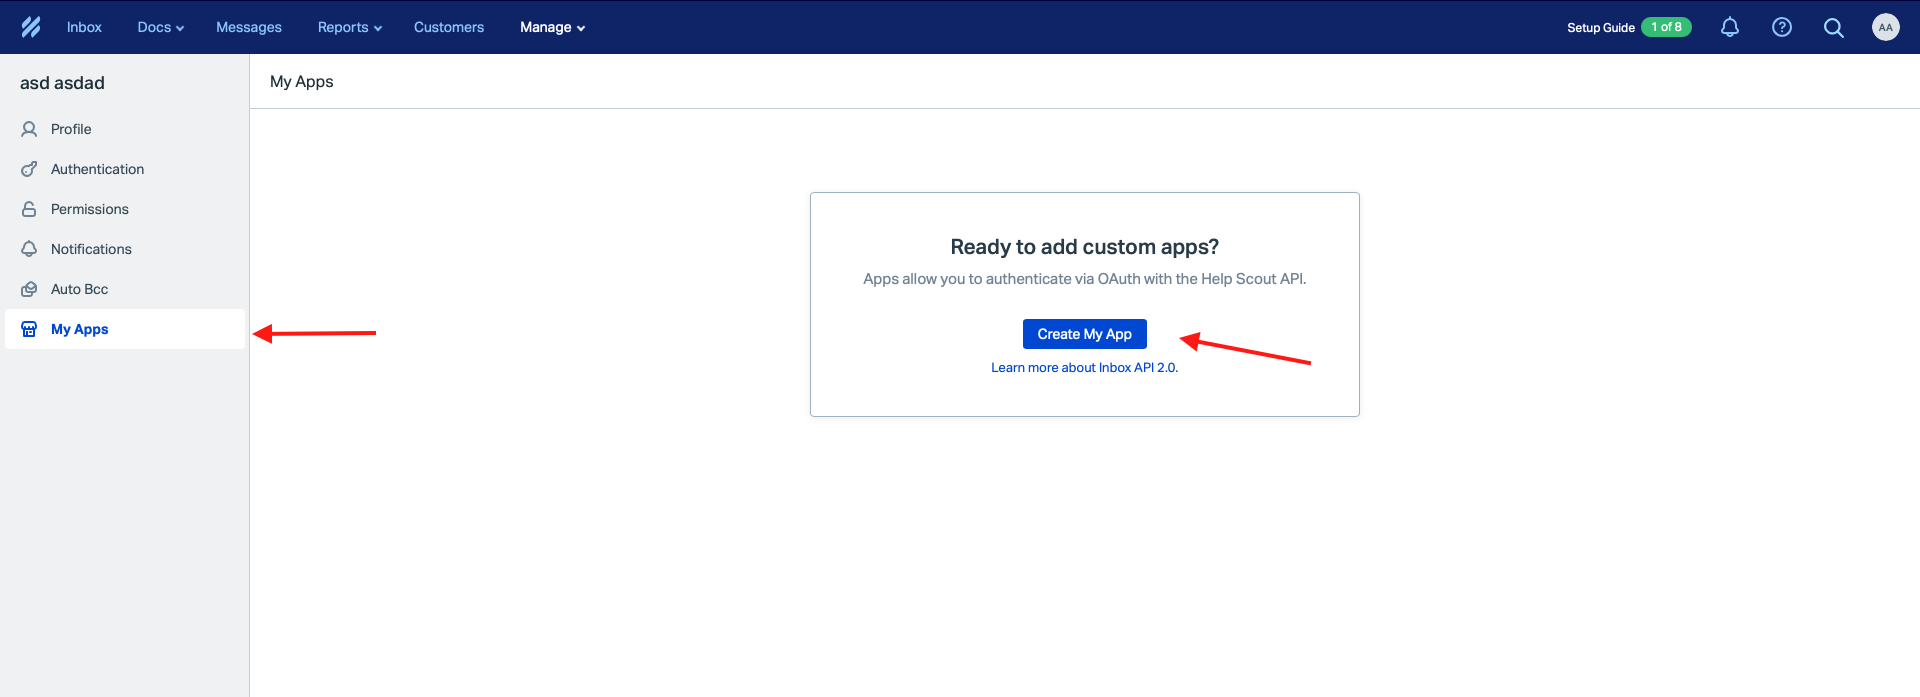
From the left menu, click on My Apps > Create My App
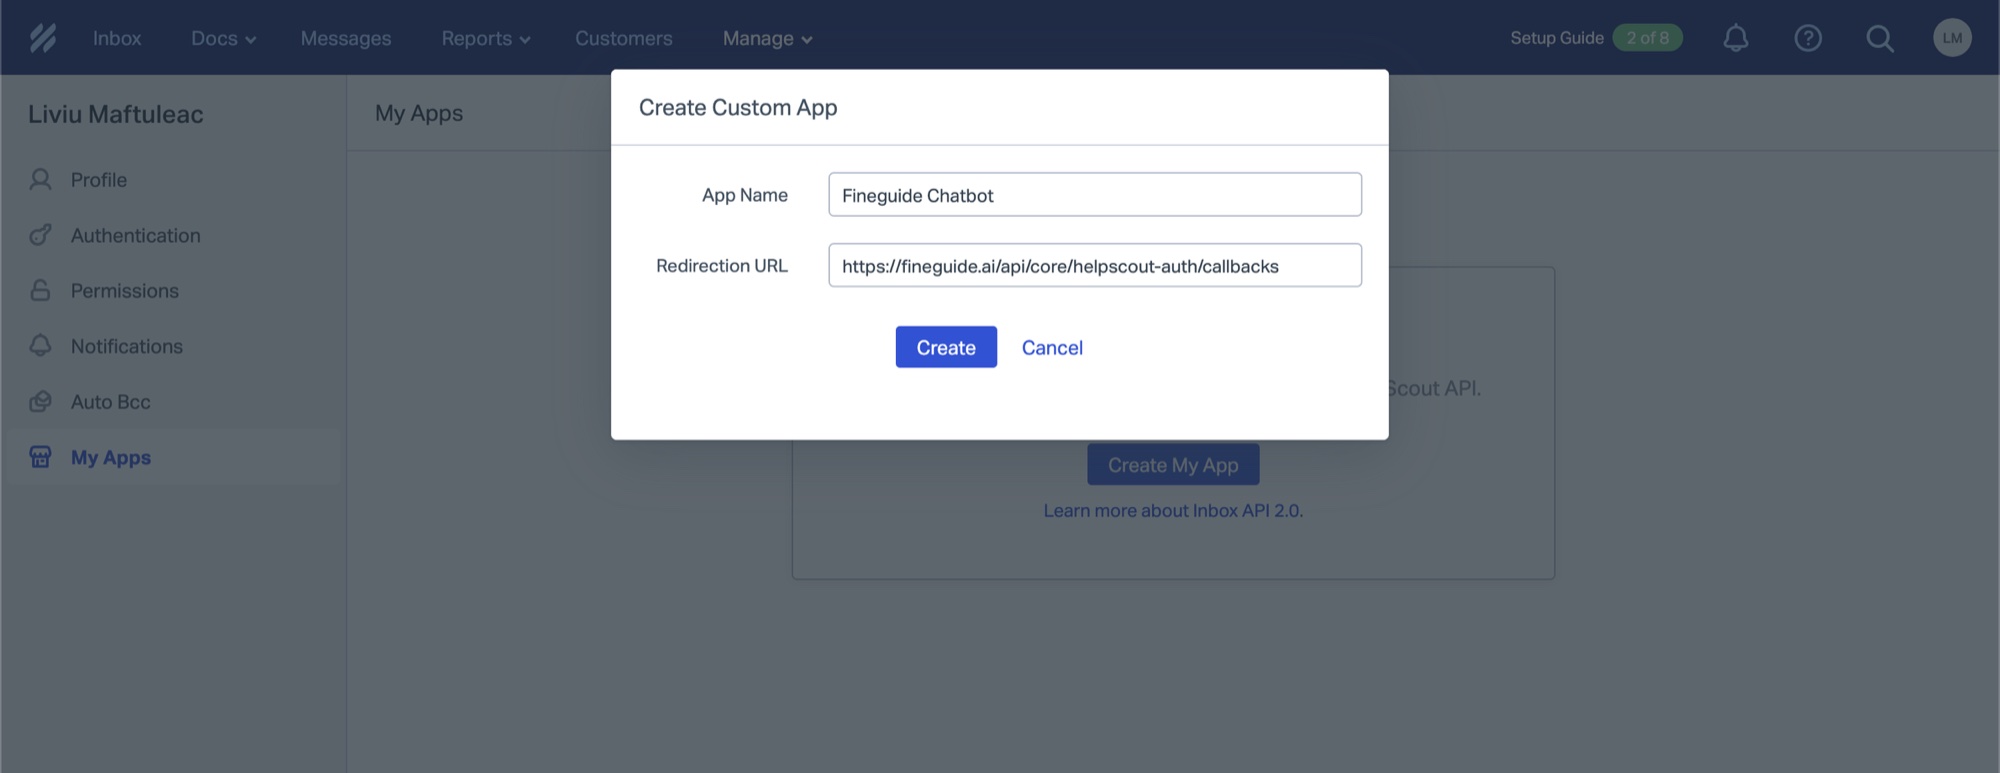
In the App Name write “Fineguide Chatbot”, paste the callback URL from the Redirection URL from Step 1, and click Create.
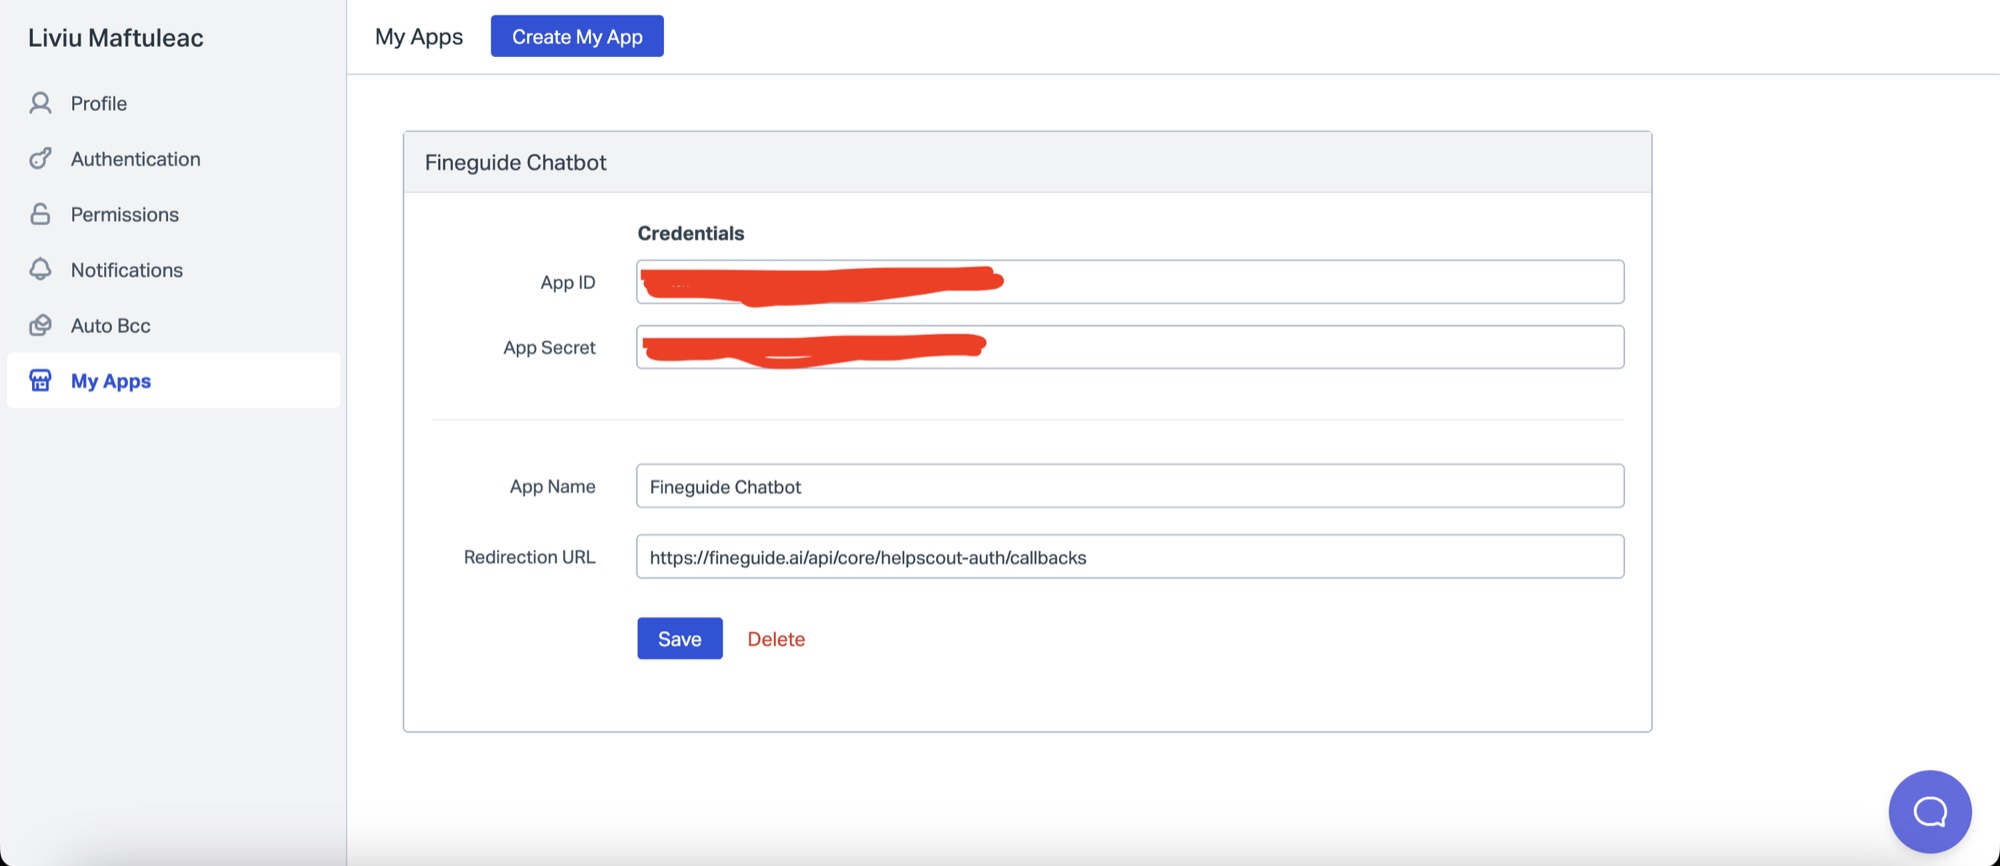
If all goes well, you should see a screen where you have App ID and App Secret. We’ll need those two values for Fineguide.
Step 3.
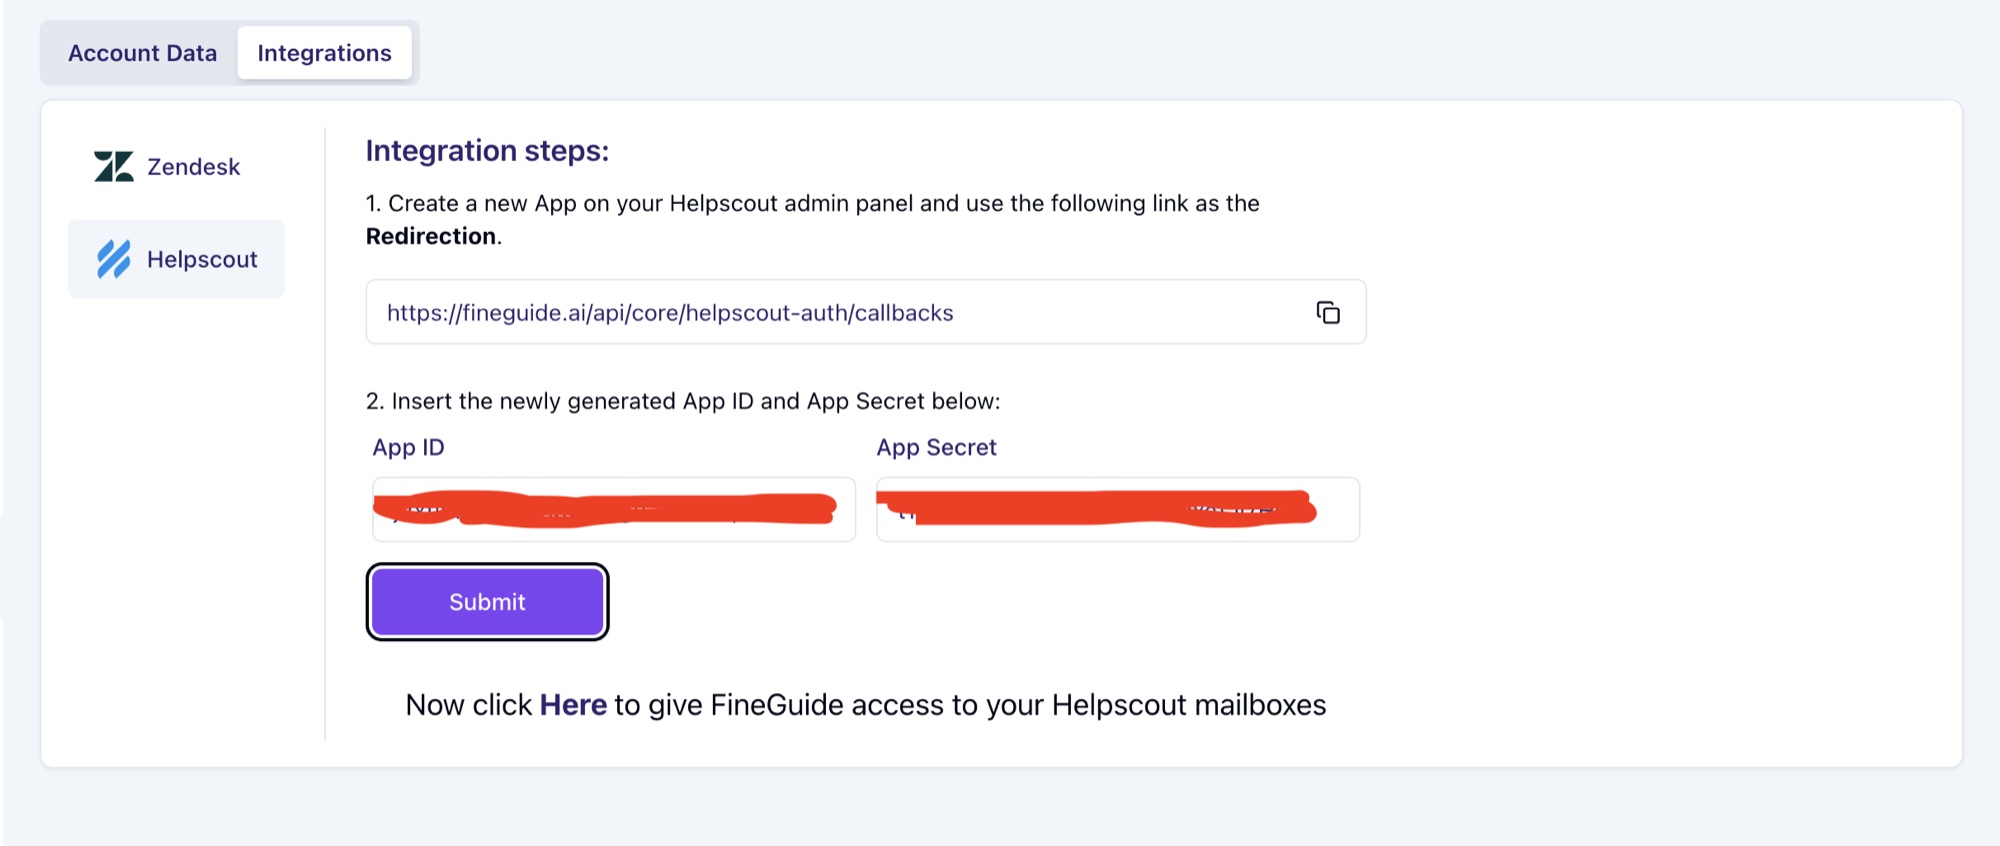
Go back to Fineguide Tab, paste App ID and App Secret in their respective fields, and then click Submit. Follow the link to go to Helpscout authorization screen.
Click on the link to authorize Fineguide to send tickets to your Helpscout Inbox.
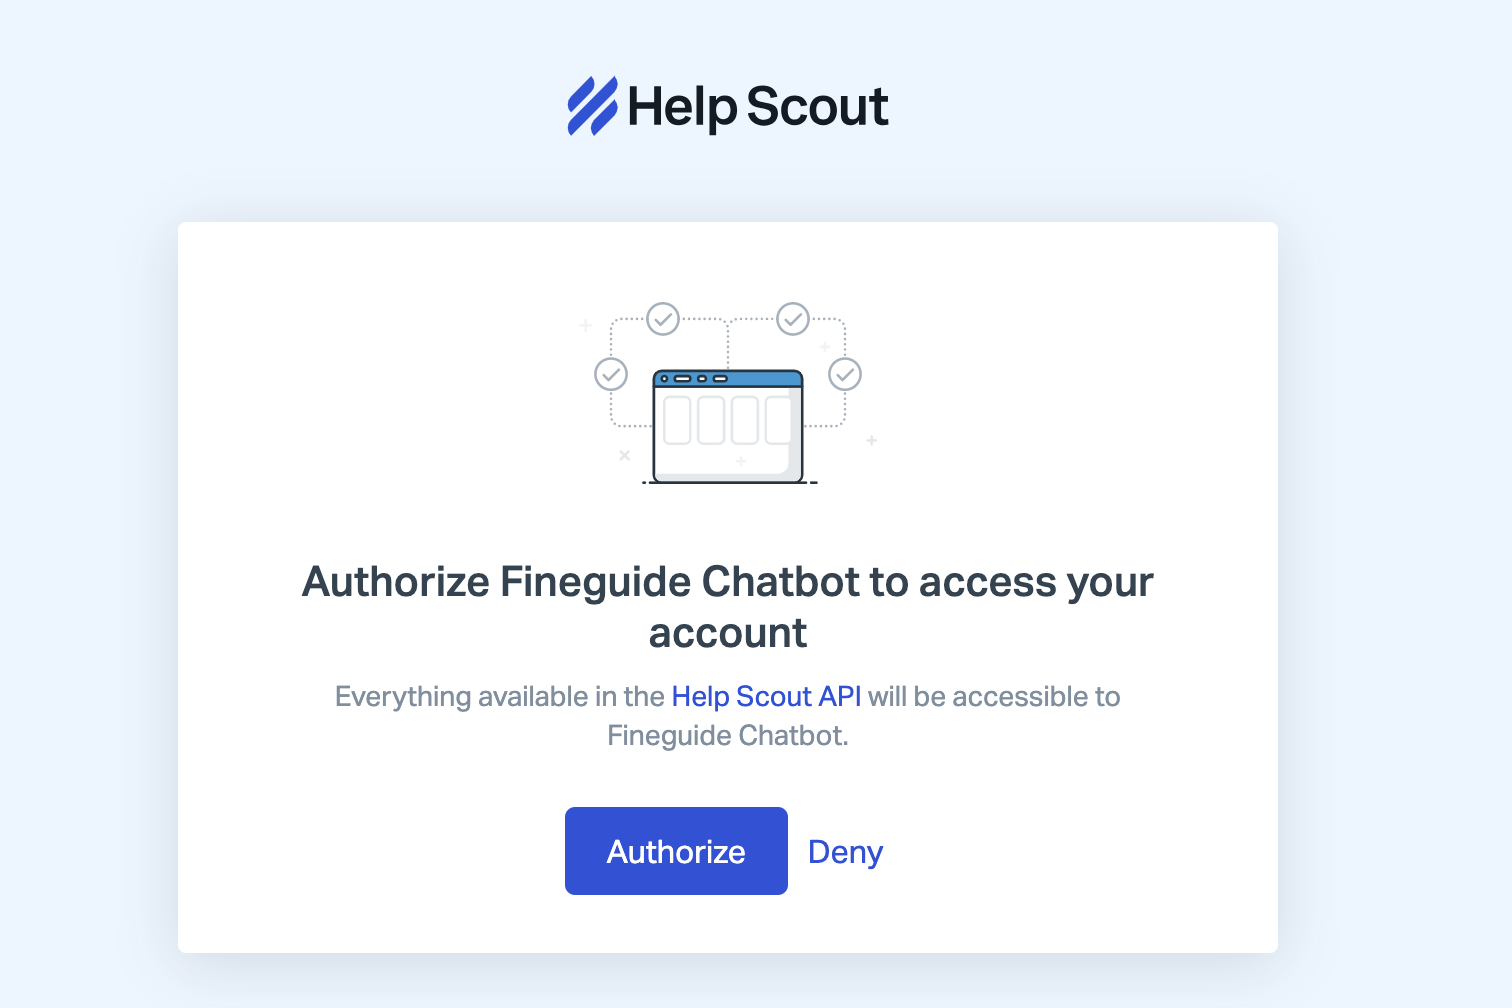
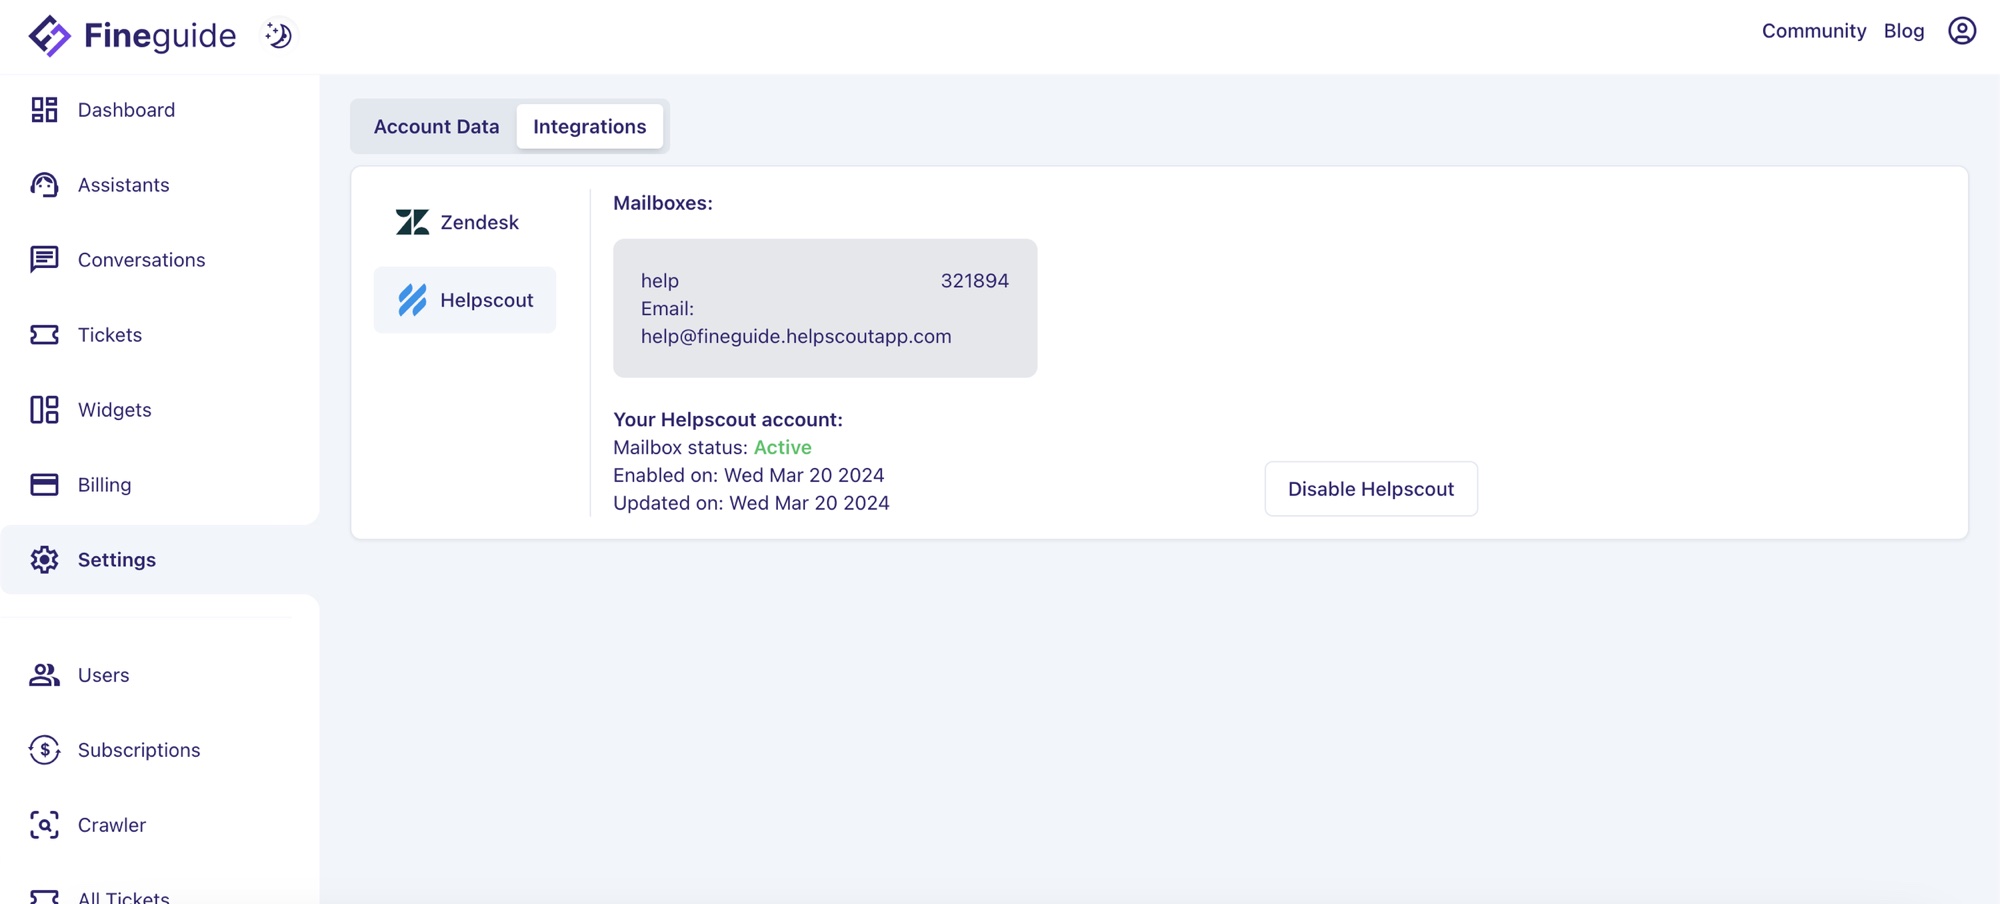
After you click on the Authorize button, the screen should remain blank. Go back to Fineguide settings, and you should now see Helpscout activated.
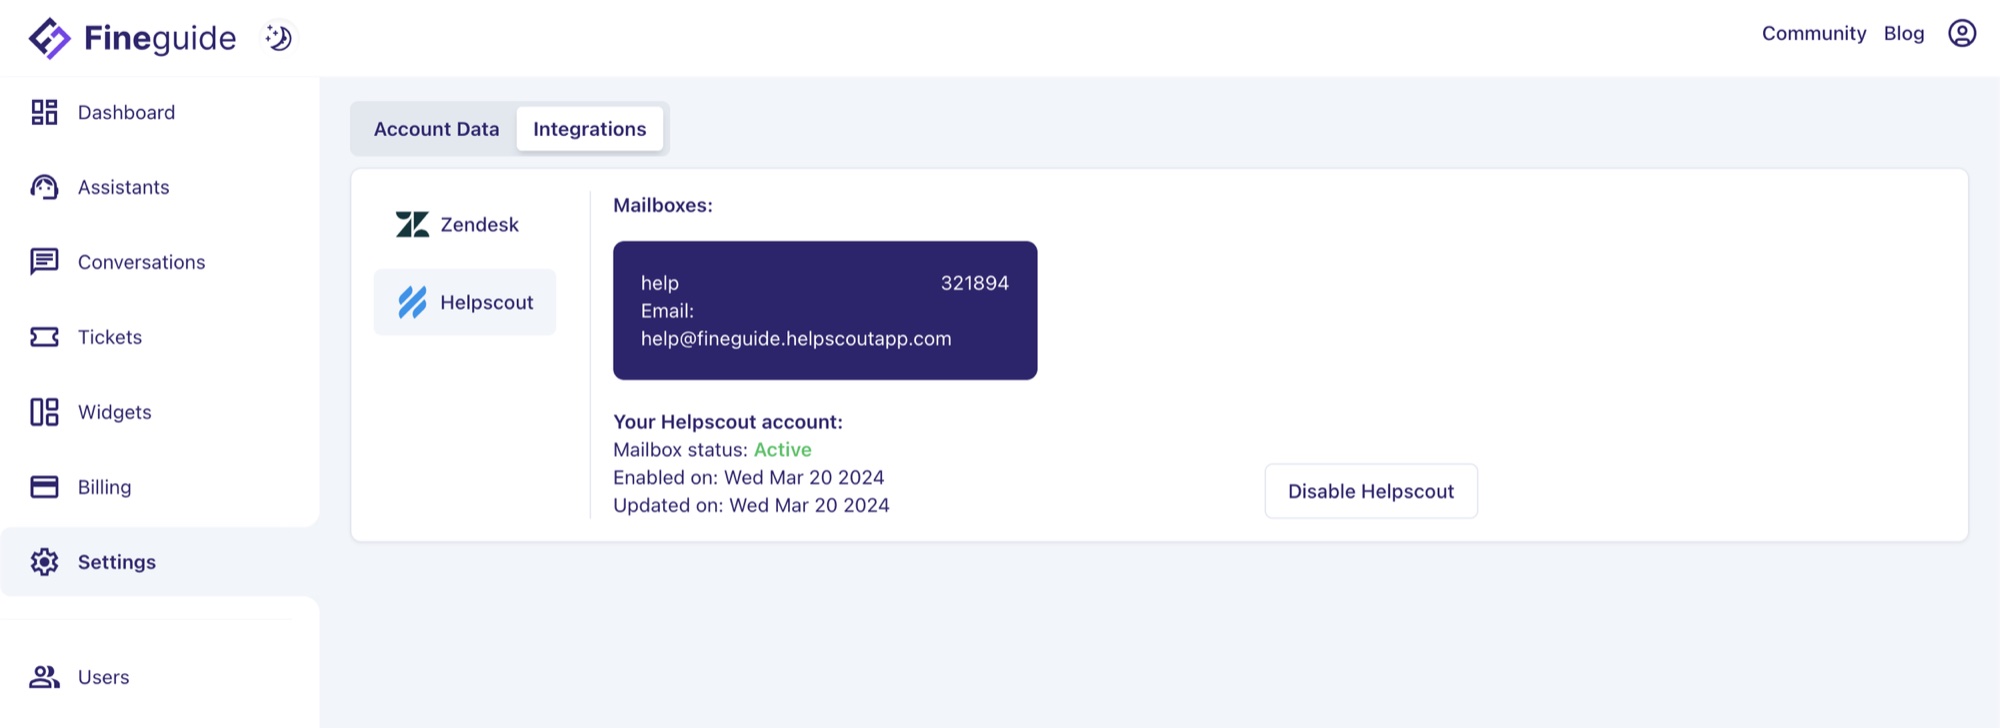
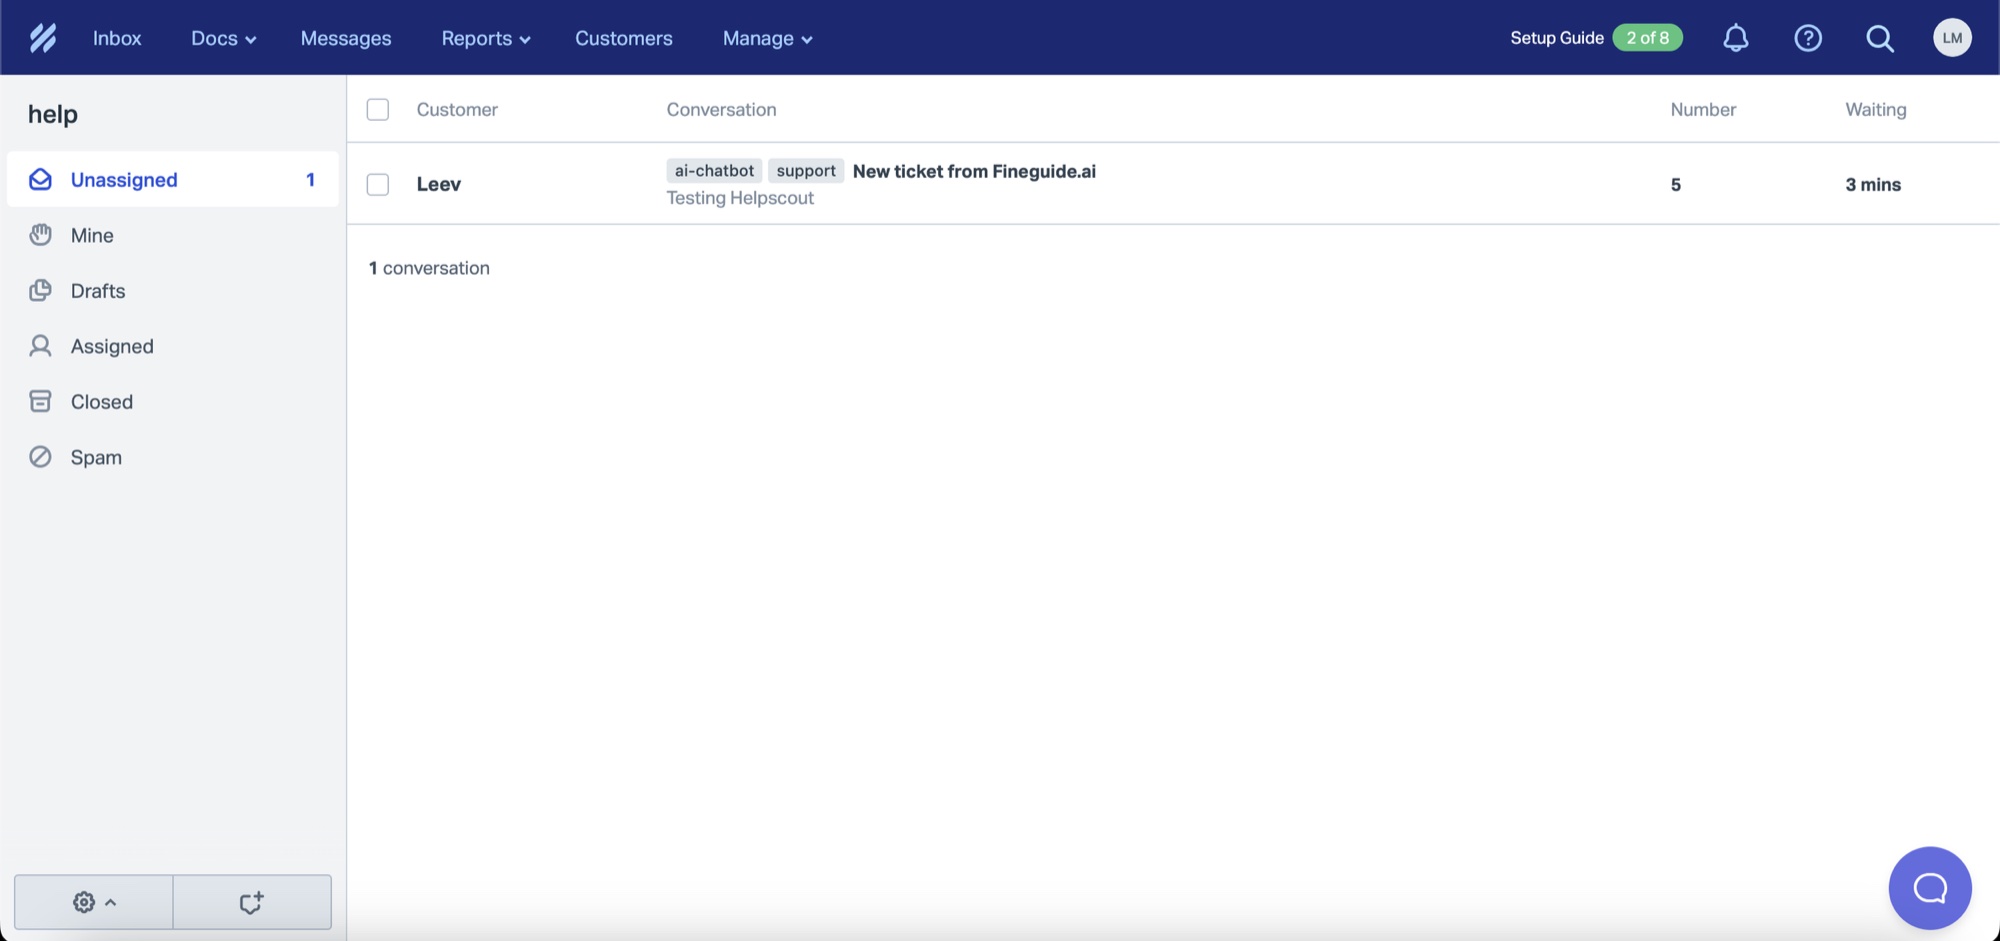
Next, click on the Mailbox you want to forward your tickets to. In my case, I have only one mailbox named “help”. After you select and confirm the mailbox, you should see your chosen mailbox highlighted
Step 4: Testing
Now let’s test if your tickets end up in Helpscout. Go to Assistants, click on any Assistant, and start a conversation. Once the conversation starts you should see a mailbox icon in the chat header.
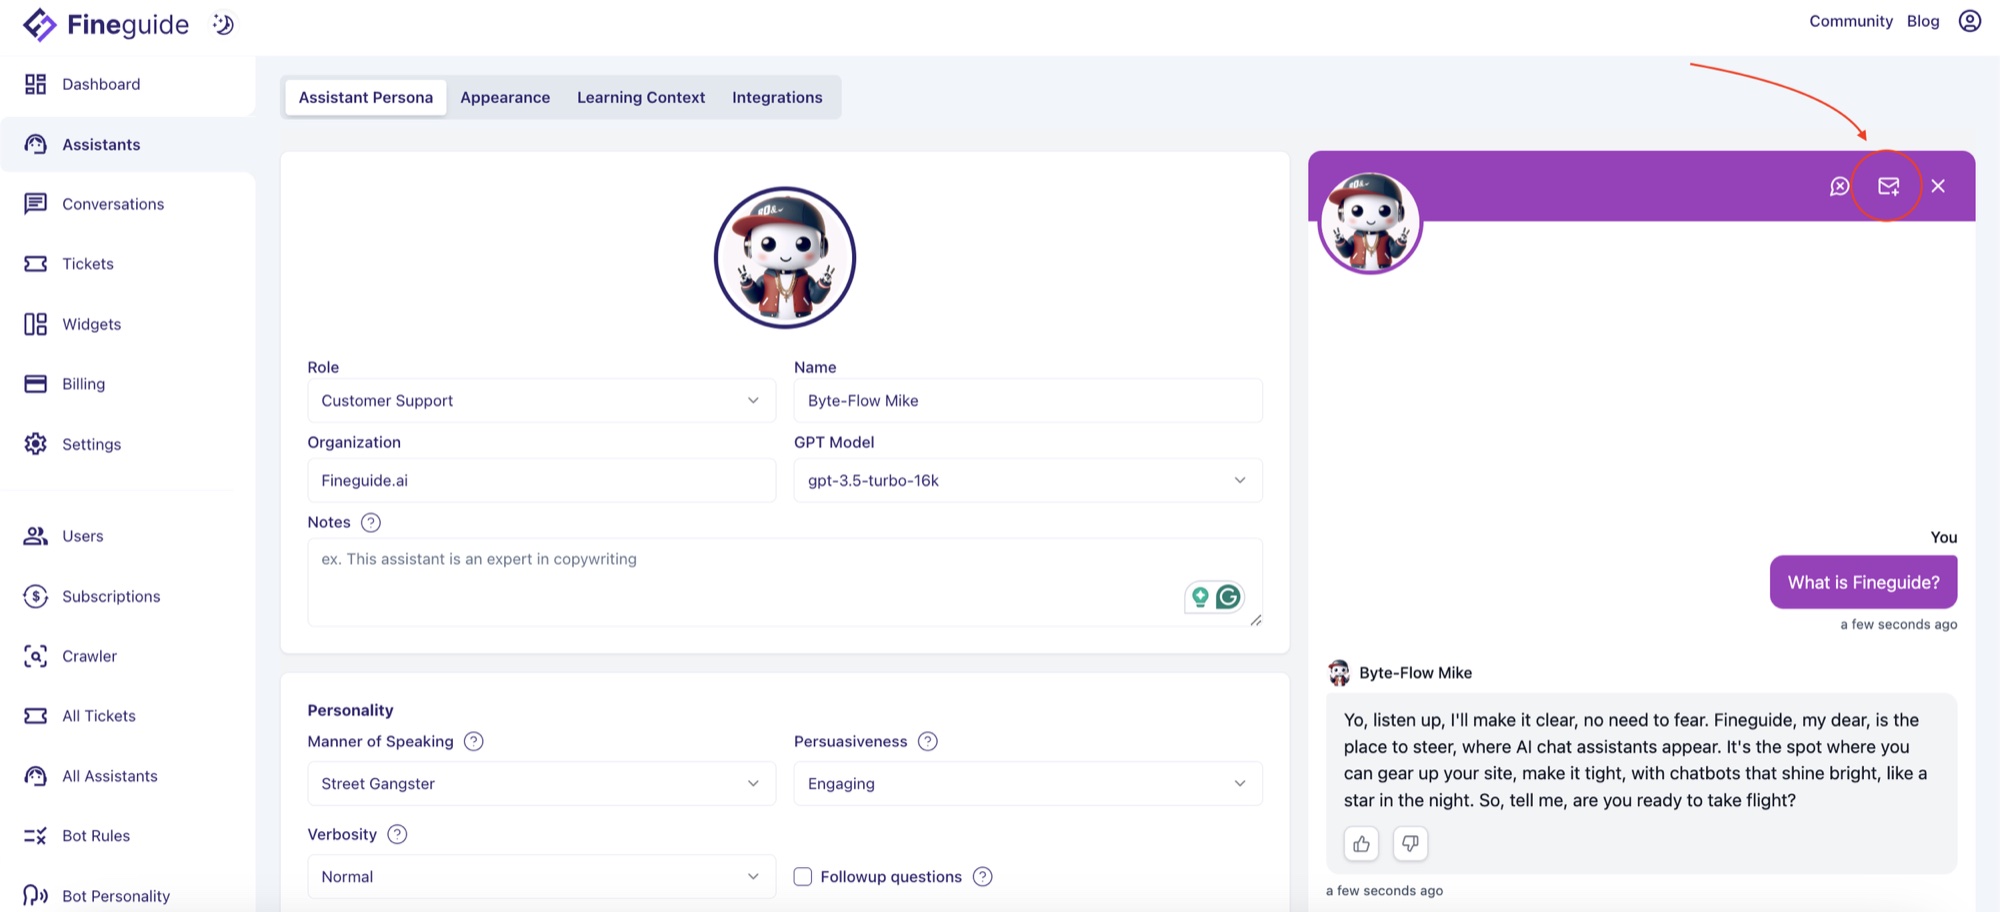
This should open a ticket creation pop-up. Complete the form and click on submit
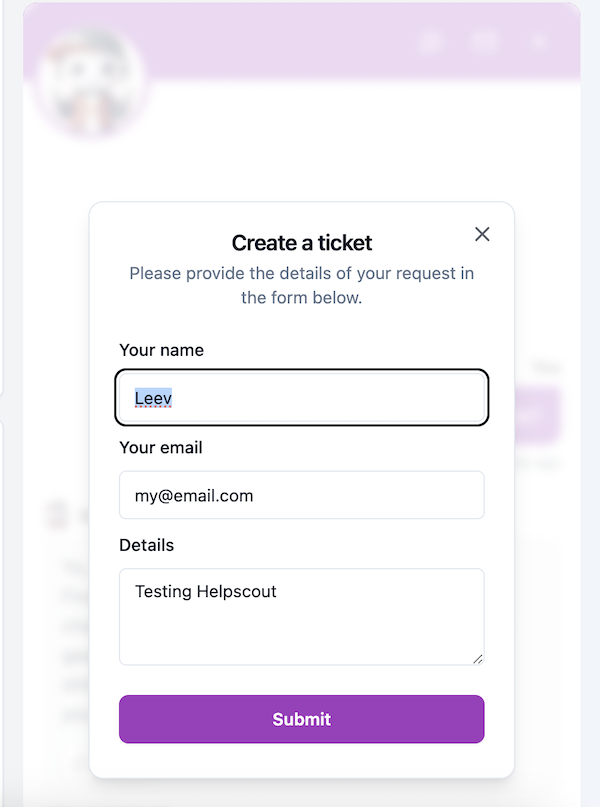
Once this is done, Fineguide should forward your Ticket to Helpscout Inbox.
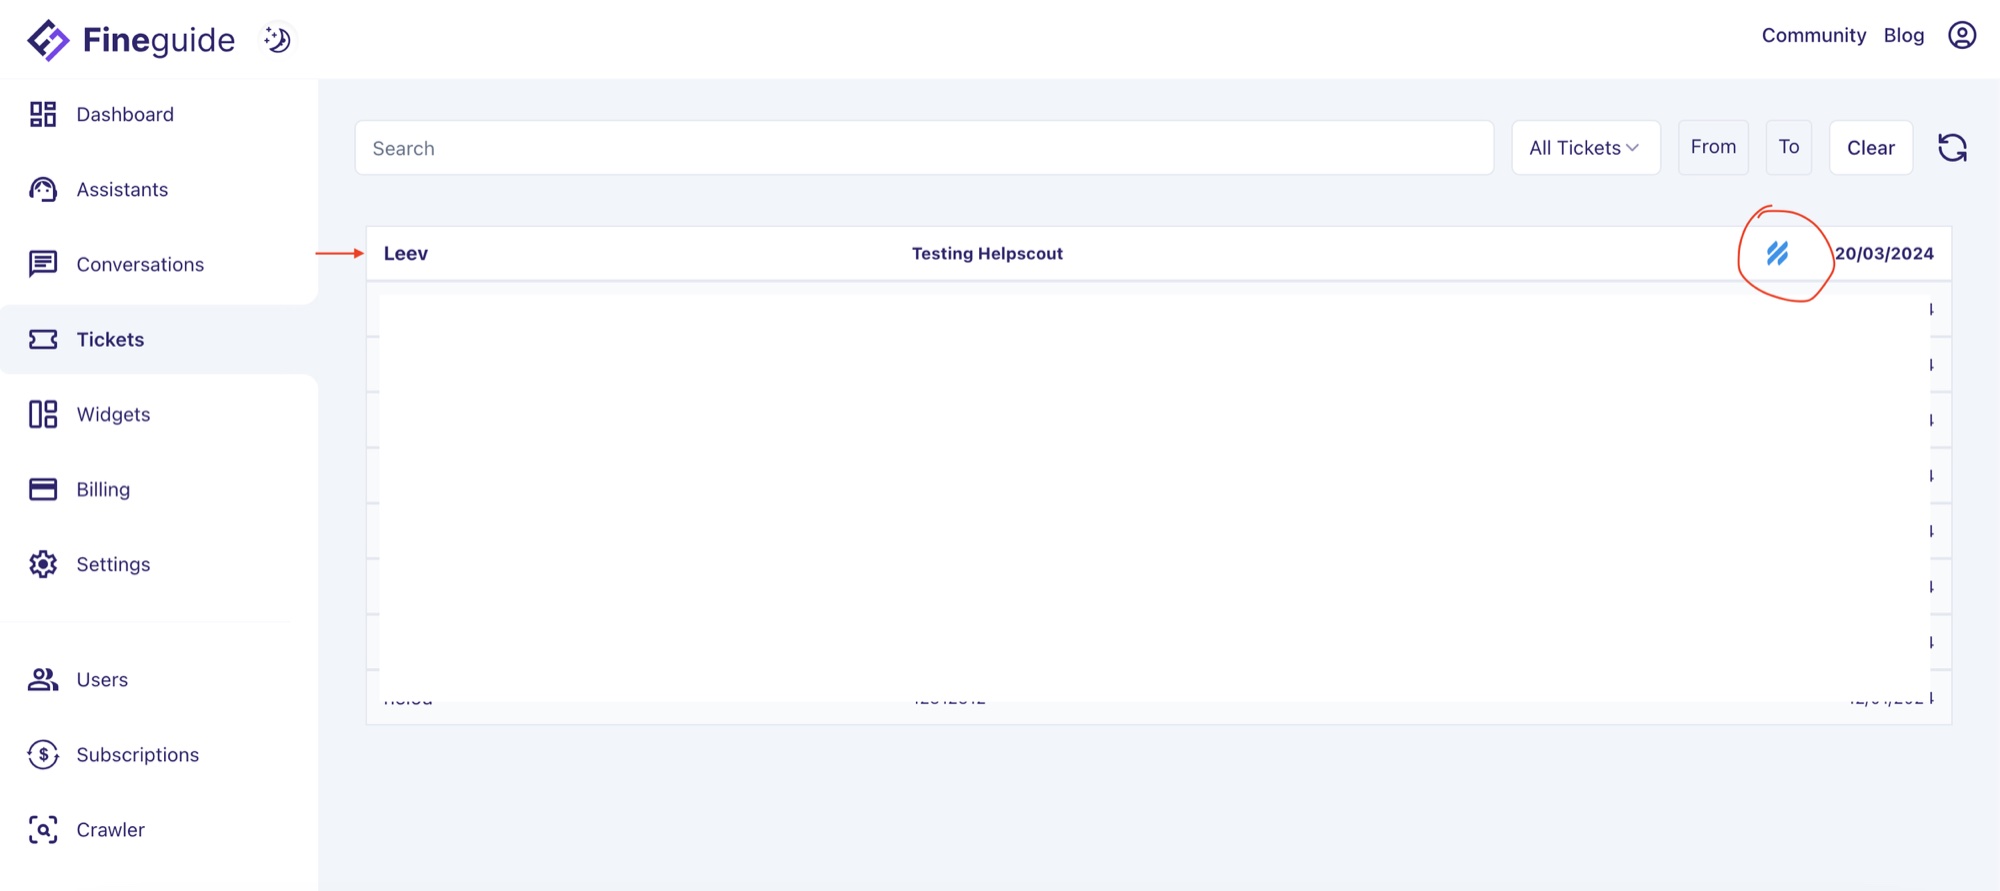
A copy of the ticket is also created in the Fineguide ticketing system. You should see the Helpscout logo if the ticket was successfully forwarded.
That’s it! 🙂