Integrating Kommo with your Fineguide assistant allows you to sync conversations, automate CRM updates, and enhance your customer interaction workflows. Follow this step-by-step guide to connect, verify, and configure the integration.
From the Fineguide dashboard:
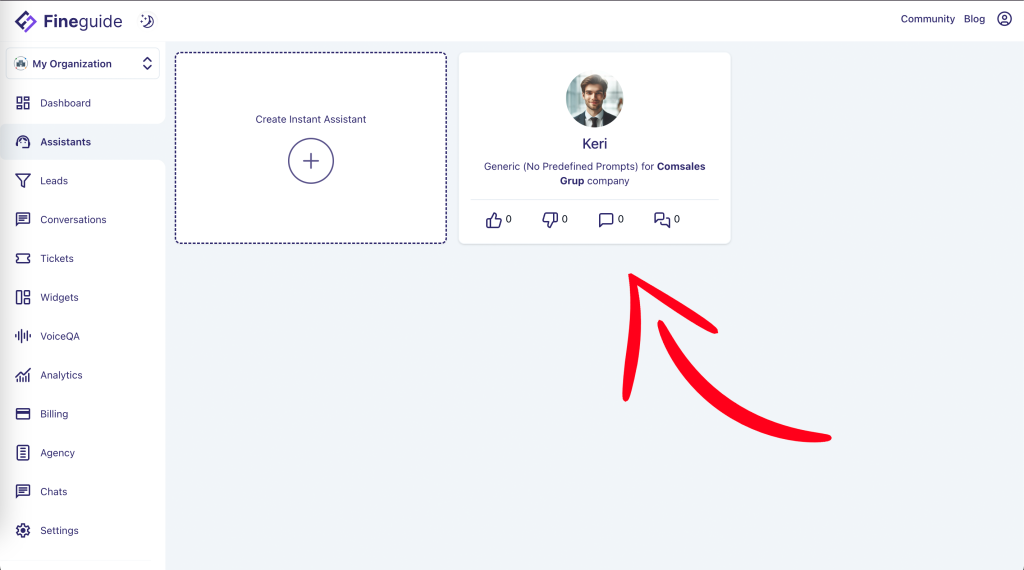
1. Select the assistant you want to connect (or create a new one if needed).
You’ll see the assistant profile card — click it to open.
Navigate to My Organization → Assistants.
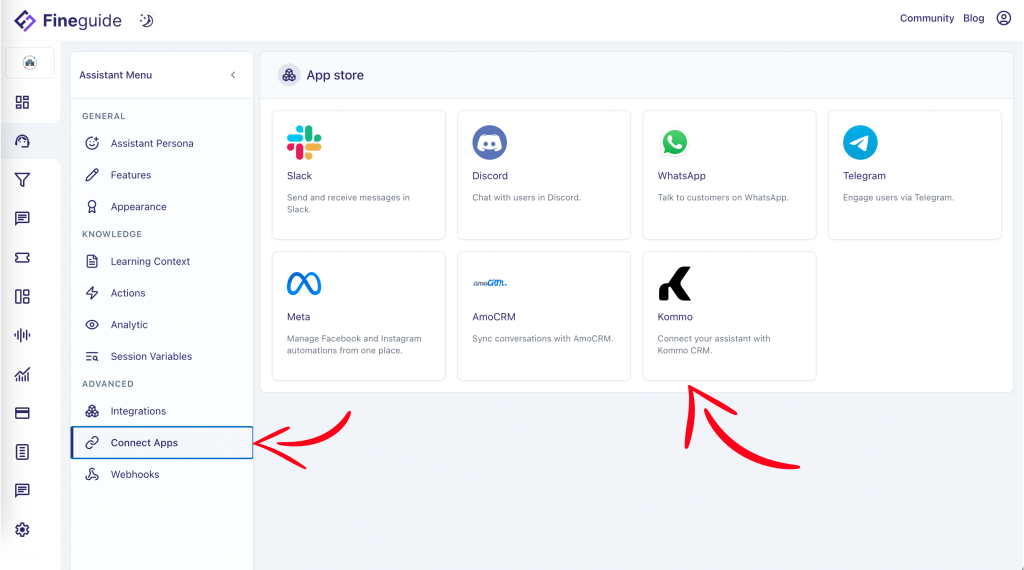
2. Go to the Connect Apps Section
Inside the assistant settings panel:
Locate the Kommo tile in the App Store.
In the left sidebar, scroll to the Advanced section.
Click Connect Apps.
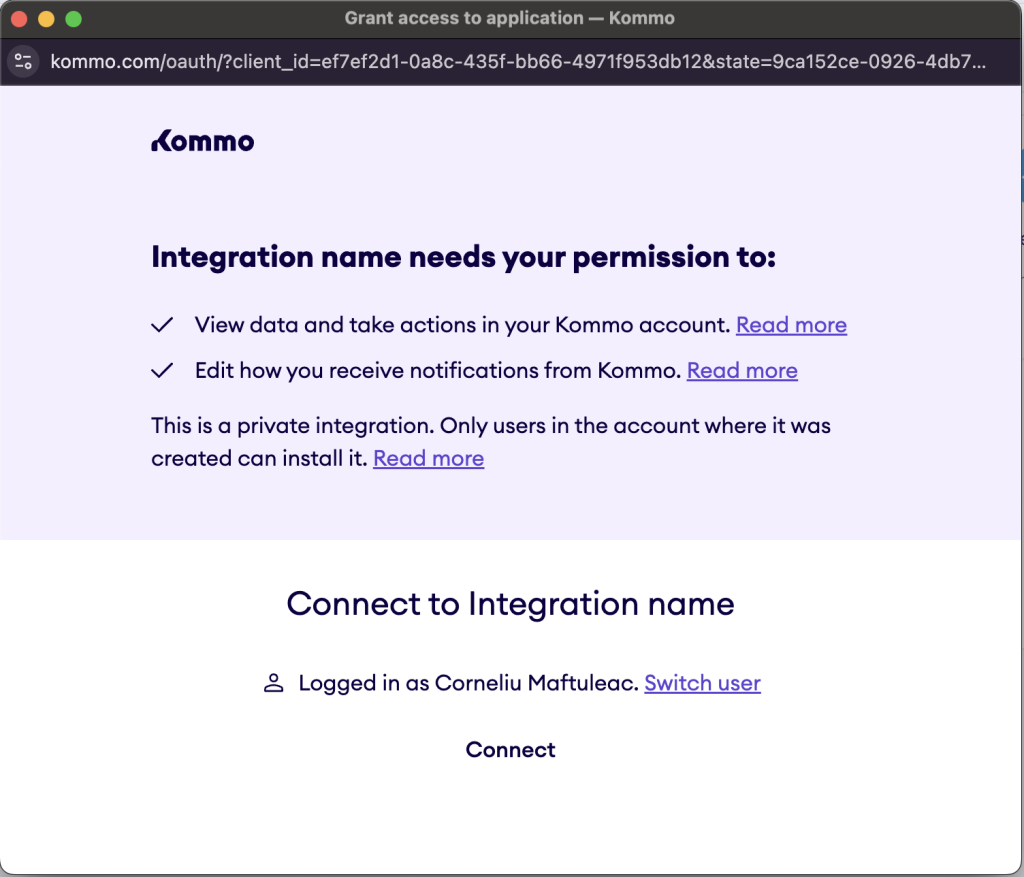
3. Authorize the Integration
When you click the Kommo integration tile, a new authorization window will open.
Here’s what to do:
- Review the requested permissions (e.g., viewing data, taking actions, managing notifications).
- Select the Kommo account where you want to install the Fineguide app.
- You can switch accounts or add a new Kommo account if needed.
- Click Connect to grant access.
Once approved, the authorization window will close automatically, returning you to Fineguide.
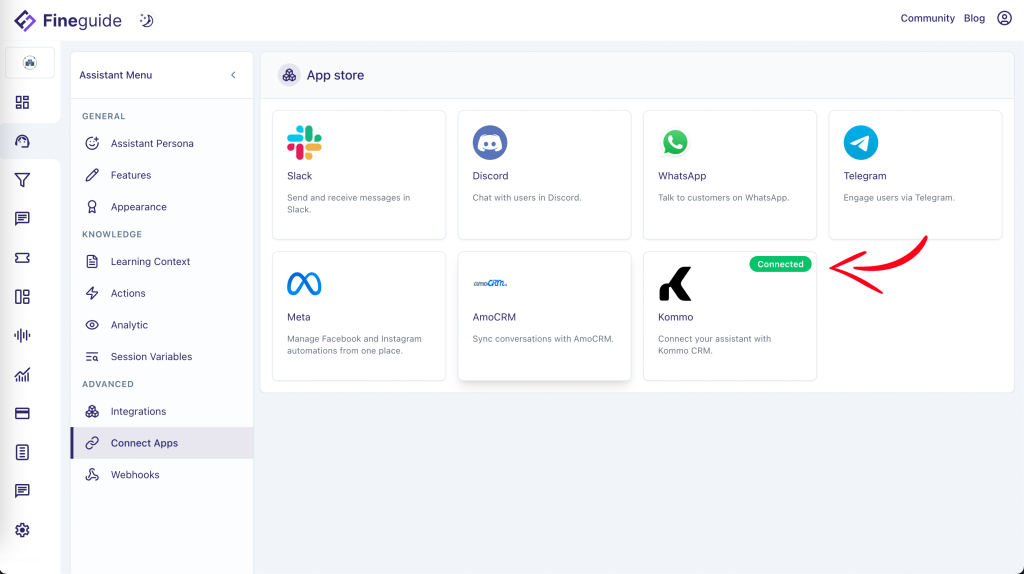
4. Confirm Successful Connection
Back on the Fineguide platform, the Kommo integration tile will display a green “Connected” badge.
This indicates that your assistant is now linked to your Kommo workspace.
5. Configure Integration Settings
Click the Kommo tile again to open the configuration panel.
Here you can:
Remove or reset the integration if needed
Enable/disable your assistant on specific Kommo channels
Reload channel lists
Use the Data Explorer to inspect synced information
Set up Filtering Rules to control message routing
This section allows you to define when and how the assistant should respond in Kommo.
You can create rules based on message source, tags, pipeline logic, or other CRM attributes.
